Having dealt with a less than satisfactory plein air easel for years, I spent hours-nay, years- researching field easels before buying a new one. I chose the Joe Miller Signature model because:
- it has four telescoping legs
- it has three shelves for palettes and supplies
- the arms are adjustable and can lay horizontally for watercolors, etc.
- it’s pretty
- it only weighs ten pounds
- I like Cheap Joes, and it was on sale
However, some problems were apparent upon setting my new easel up for the first time:
- the finish was very thin
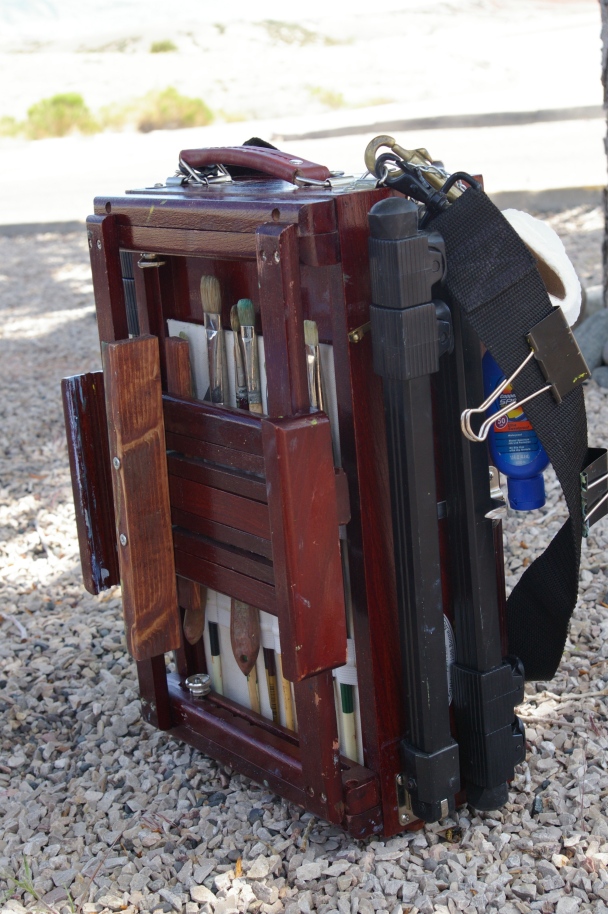
- two of the four legs flop out when folded up, making carrying it a pain
- I’m just 5’5″ and the vertical position, the lower painting “shelf” goes no higher than the top of the base of the easel, which would be ideal for someone extremely short or sitting in a chair. It’s so far below eye level that few people could comfortably paint in oil standing at this easel. Note: Joe is a watercolorist; this wouldn’t pose a problem for someone painting on a horizontal substrate.
- The paint storage compartment is too shallow to easily accommodate average-sized tubes of oil or acrylics. An extra half-inch would save a lot of time and hassle in this regard. Note: this wouldn’t be a problem for a watercolorist, as w/c paint tubes are smaller.
- The sliding shelf over the afore-mentioned paint storage is wasted space; if it had a larger bottom lip, it could store something under the painting holder when folded up
First, I varnished the entire easel, inside and out, with two more coats of polyurethane to strengthen and protect the wood.
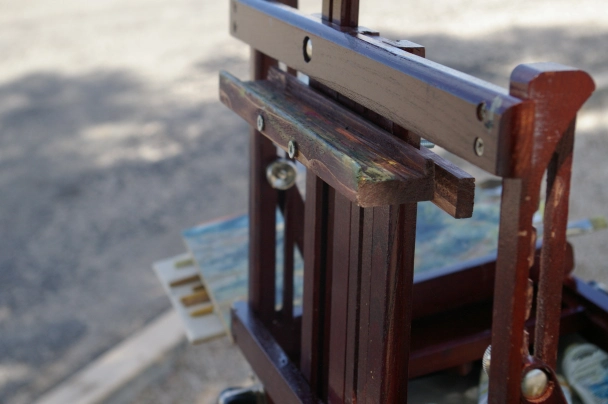
Next, I fashioned an additional painting bracket from a scrap of 1×2 pine: I ran it through my table saw at 1/8-inch intervals through the middle of the length of wood, leaving about an 1/8 of an inch on each side. I used a chisel to clean out the slivers of wood the table saw missed, and cut it to my desired length. Then I ripped a smaller piece to about 1 x1/4-inch and cut it to the same length as the front piece. I sanded, stained and drilled holes through both pieces so that two bolts would fasten the pieces on either side of the painting holder, fastening with wing nuts on the back. This is fully adjustable, and I’ve never used the easel without it.
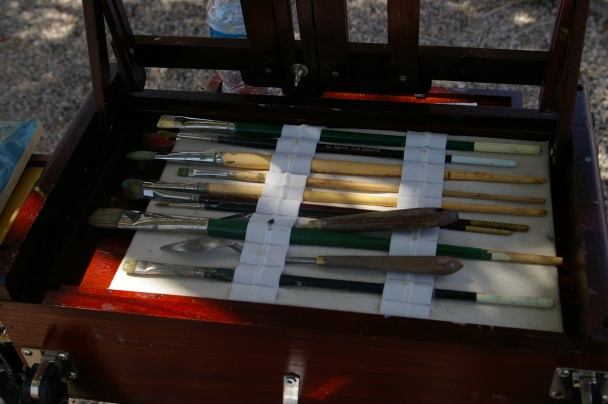
I glued and screwed a thin wooden “stop” to the bottom side (when upright) of the paint storage lid/shelf so that it can hold a brush holder, which I made by sewing two strips of elastic to a piece of canvas in varying widths, then adhering it to the back of a watercolor block (thick cardboard), finishing the back with paper canvas (which could be another palette in a pinch). Now my easel holds an adequate supply of brushes and palette knives safely under the painting rack. The wood addition keeps it from falling out when carrying the easel. There’s also room for a fold-up car window shade if you use one, or another thin wooden palette (not pictured), which covers the brush holder.
Next, I found some strange type of bracket at our local re-store that perfectly holds the wayward legs in place during transport. I wish I knew what they were called, but I don’t.
I cut down an old thin wooden palette to fit the right hand shelf. It can be removed and clamped to any shelf during painting (perfect for when I don’t have room for my big covered palette). One could also cut down paper palettes, but that seems wasteful to me. I cut a similar palette down for the paint storage lid (not pictured).
The Cheap Joes easel doesn’t come with a shoulder strap, so I took one off a nice duffel bag we weren’t using. This holds clamps for attaching shades, a palette or dealing with wind.
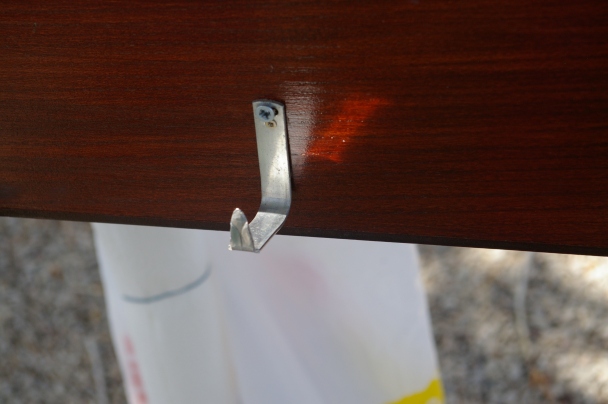
I attached a chain to the front D ring and put a snap on the other end of it to hold a roll of paper towels. While painting, I unsnap it and clamp the snap end, making a hanging paper towel dispenser next to the trash bag (a rubber band keeps the towels in place). Another hook holds my turp can on the front shelf, rather than dangling from the side hook that came on the easel. Be sure this hook is small enough to allow the legs to fold up. A snap on the D ring holds travel-sized sunscreen, a garbage bag (and even the turp container can while in transport).
I am completely satisfied with my Joe Miller Signature Field Easel and would recommend it to any plein air artist. It’s a perfect “traveling studio” that I’ve used in hotel rooms as well as in high mountain terrain. During an OPA Paint Out last year several people complimented its beauty and function. The modifications I made make the easel more user-friendly to oil or acrylic painters and truly make it a more wonderful easel for anyone. Now, if I could only find a way to make the paint storage deeper…


Incredible! I love stuff like this. My old french easel is modded quite similar but yours is even better -very inspirational!
This is great, Sonja! Would you like to share your tip with my blog? http://finearttips.com If so, we would have to rewrite it just a bit for SEO purposes. Let me know what you think!
Thanks, Lori
Sounds Great, Lori! Now I wish I’d taken a picture with a completed painting on the easel:) Thanks so much!
I’m getting this easel today off Craigslist! I plan to paint in oil and am 6 foot 2, so hopefully it won’t strain me too much. I guess i’lll have to sit! THx for the post!
I’m about sure it’s going to be too short for you if you paint in oils, Brad-but with the modifications, maybe it will work. The shelves are so nice- it’s a great easel. I painted at a workshop with a tall woman who didn’t have a problem with hers for watercolors. Good luck!